How to create an Image Upload Viewer with Alpine.js
Sometimes, when we create a form with image upload, it may be a good idea to preview the image before sending it to the backend or to preview the image that is already uploaded when opening the form to edition.
In this tutorial, I’ll teach you how to create a simple and reusable Alpine.js component to preview uploadable images.
This post assumes you have a basic knowledge of Alpine.js.
To facilitate the process I’ll use the TailwindCSS framework to style the component, but don’t worry, I’ll only use some simple styling and I’ll explain the relevant CSS I’m using when necessary.
Starting the component
Assuming we already have an HTML page with Alpine.js installed, we can start declaring the component code:
function imageViewer(){
  return{
    imageUrl: '',
  }
}
Now we can add the component template to our HTML:
<div x-data="imageViewer()">
<div class="mb-2">
<!-- Show the image -->
<template x-if="imageUrl">
<img :src="imageUrl"
class="object-cover rounded border border-gray-200"
style="width: 100px; height: 100px;"
>
</template>
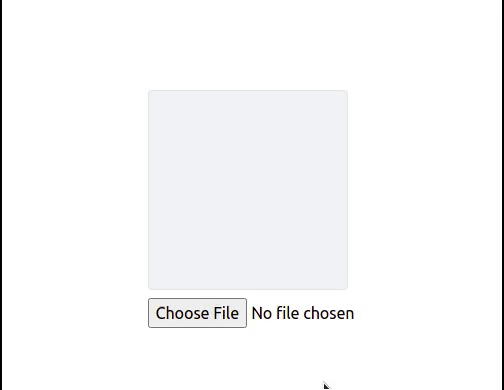
<!-- Show the gray box when image is not available -->
<template x-if="!imageUrl">
<div
class="border rounded border-gray-200 bg-gray-100"
style="width: 100px; height: 100px;"
></div>
</template>
<!-- Image file selector -->
<input class="mt-2" type="file" accept="image/*">
</div>
</div>
The code above checks if the imageUrl property is filled. If so, it will show the image tag. Otherwise, it will show a small gray box in the place of the image.
Notice that we used the object-cover class from TailwindCSS on our image tag. It adds an “object-fit: cover;” CSS property to avoid the image losing aspect ratio and centering it on the preview.
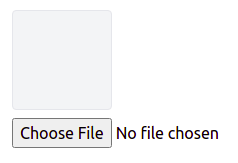
After that, we can see something like it when running our code:
Previewing the image
Now, let’s add the code to preview the image when choosing a new file to upload.
Firstly, we’ll update the file input to call the fileChosen method when a file is chosen:
<input class="mt-2" type="file" accept="image/*" @change="fileChosen">
Then we can implement this method on our component:
function imageViewer() {
  return {
    imageUrl: '',

    fileChosen(event) {
      this.fileToDataUrl(event, src => this.imageUrl = src)
    },

    fileToDataUrl(event, callback) {
      if (! event.target.files.length) return

      let file = event.target.files[0],
          reader = new FileReader()

      reader.readAsDataURL(file)
      reader.onload = e => callback(e.target.result)
    },
  }
}
The most important method here is fileDataToUrl. It is responsible for reading the file data and convert it to a data URL (a base64 representation of the image file).
So, inside the fileChosen method, we can get this data URL result and store it on the imageUrl property.
As image tags accept both: image addresses and base64 data representations, we can use this trick to display our image before uploading it.
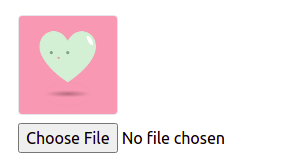
Adding a default image address
Now let’s do a small change to our component to allow defining a default image path/address. It will help us showing already uploaded images when opening an Edit Form.
To do it, we’ll add the following changes to the component:
function imageViewer(src = '') {
  return {
    imageUrl: src,
    ...
  }
}
Now we can pass an image address to your component to init with a preloaded image:
<div x-data="imageViewer('heart.png')">
  ...
</div>
Conclusion
With this simple and reusable Alpine.js component, you can add an image preview to your form uploads.
I hope this tutorial is util for you. Cheers!
